Tomato Restaurant Template
Tomtao Responsive HTML5 Restaurant Template Documentation v1.0 by Surjith S M
Introduction
- Item Name : Tomato Restaurant Template
- Item Version : v 1.0
- Author : Surjith S M
- Support / Help : https://support.surjithctly.in/
First of all, Thank you so much for purchasing this template and for being my loyal customer.
You are awesome!
You are entitled to get free lifetime updates to this product + exceptional support from the author directly.
This documentation is to help you regarding each step of customization. Please go through the documentation carefully to understand how this template is made and how to edit this properly. Basic HTML and CSS knowledge is required to customize this template. You may learn basics here, here and here.
Requirements
You will need the following sofwares to customize this template.
- Code Editing Software (eg: Dreamweaver, Sublime Text or Notepad)
- Web Browser for testing (eg: Google Chrome or Mozilla Firefox)
- FTP Tool to upload files to Server (eg: FileZilla)
Be careful while editing the template. If not edited properly, the design layout may break completely.
No support is provided for faulty customization.
Getting Started #back to top
If you are able to read this documentation locally, which means you have successfully downloaded the package and extracted the zip. The file structure as follows :
    Tomato/
    ├── Help Docs/
    ├── HTML/
    │   ├── css/
    │   │   ├── themes/
    │   ├── fonts/
    │   ├── img/
    │   ├── js/
    │   │   ├── vendor/
    │   ├── php/
    │   ├── *.html
The folder you have to customize is the HTML folder. Copy HTML folder from the package and paste it in your Project Folder. (This helps you to prevent overwriting in original files. so if you messed up something, you will get the original here.)
Homepage Layouts #back to top
The next step is to choose your favorite layout. We have created different kind of layouts.
- Static Image -
index.html - Image Slider -
index_slider.html - Image Parallax -
index_parallax.html - Video Background -
index_video.html - On Scroll Animation -
index_animations.html
Reservation Forms #back to top
Reservation forms are must in a restaurant website. We have created two types of registartion forms. You can use any of them as per your preference.
- Email Reservation (Get new resevation request by email) -
reservation.html - Open Table Reservation (Reservation integrated with Open Table) -
reservation-ot.html
Page Settings #back to top
Color Themes #back to top
If you don't want to use the default color coming along with the template, Then you can use the color themes. We have created eight pre-defined color themes to make your website unique for you. Once you setup the layout, You can choose an existing color theme or create a custom one
Choose Exising color themes
You can choose between these seven colors blue,brown,cyan,green,orange,pink,red and yellow. You can also try these colors in the Live Demo page (Pick color from the left panel). So if you like the red color, You can apply this theme by adding the below line in HTML <head> part. Please make sure you have added this below main.css link.
<link href="css/themes/red.css" rel="stylesheet">
Creating new color theme
If you don't like the existing color theme, you can create new color theme easily. First open /css/themes folder and duplicate any existing theme and rename it to your color name. Then open it in a code editor, select the existing highlight color and click find all option in your editor. Then replace with your own color. That's it. Now call that file name in your HTML to see your new color theme.
Animations #back to top
We have included a subtile animations for elements while scrolling. To activate the on-scroll animations, Open HTML and add the below data-* attribute.
<body data-scroll-animation="true">
Then, You can add the animation effect to any element by adding the following class to any element. For example you want to apply on scroll animations to a <div> element, The final code will look like :
<div class="wow fadeInDown">
This template uses Animate.css plugin for animations. So you have the option to change the effect from any available options on Animate.css Such as fadeInDown , fadeInUp , zoomIn, bounceInDown, bounceInLeft etc. Please note that the Class names are CASE SENSITIVE.
Turn off Animation
If you don't want to use the onscroll animation, You can simply do it by removing data-scroll-animation="true" attribute from the <body> tag.
Form Settings #back to top
Email Reservation Form #back to top
Reservation forms are a must have in restaurant website. To setup email reservation form, open /php/reservation.php file and change the email address to yours
$to = "[email protected]"; // <--- Your email ID here
You may also change the Email Subject here:
                        if (isset($email) && isset($name)) {
                         $subject  = "New Reservation Request by $name"; // <--- Change Email Subject here.
We have made this reservation form in a way that you can easily add or remove fields from the reservation form. No extra setup is needed in the Javascript or PHP file. We'll take care of that. Just edit the HTML form-group field and you are good to go. make sure you are using appropriate name="field_name" and id="field_id" so that it will take the values programatically.
Open Table Reservation Integration #back to top
In case if you don't want to use the email reservation and want to integrate Open Table with your reservation, Its really easy to do in this template. Just use the reservation-ot.html file for your reservation.
To setup Open Table, You'll need a Restaurant ID, that you will get from the Open Table Website. Once you got the ID, Please add it in the data-restaurant-id="" attribute. That's it. You are done. Pretty easy right? Now you can start receiving orders.
                         <div class="reservation-form wow fadeInUp">
                        <div class="open-table-container" data-restaurant-id="66241">
                            <div id="OT_searchWrapperAll">
                                <form name="ism" id="ism" method="POST" action="https://secure.opentable.com/ism/interim.aspx">
                                ...
In the above code from reservation-ot.html Replace the 66241 with your actual restaurant ID.
Mailchimp Subscribe Form #back to top
As you can see there's a email newsletter signup form on every footer of this template. We have integrated with Mailchimp, You can follow the steps below to make this section work. First You will need to get some details from Mailchimp.
- Mailchimp API Key
- Mailchimp List ID
Once you have the API and List ID, Open /php/subscribe.php and Add your API Key and List ID. You can also configure some more options if you want. Such as Double Optin, Send Welcome and MMERGE tags like First Name and Last Name. See sample below.
/*
 * ------------------------------------
 * Mailchimp Email Configuration
 * ------------------------------------
 */

$apiKey       = 'YOUR_MAILCHIMP_API_KEY_HERE'; /*Your Mailchiimp API Key*/
$listId       = 'MAILCHIMP_LIST_ID_HERE'; /*Mailchimp List ID*/
$double_optin = true; /*Set False if you don't need to verify user enmail */
$send_welcome = true; /* Send Welcome email to new users */
$email        = $_POST['email'];
$fname        = '';
$lname        = '';
Contact form #back to top
A working PHP contact form is provided with the template. Please follow the steps to receive contact form messages to your email.
To receive emails, Only you need to set your email address. Open /php/contact.php file in your code editor. Then change the Email ID to yours. You may also change the Subject. See sample below
/*
 * ------------------------------------
 * Contact Form Configuration
 * ------------------------------------
 */

$to    = "[email protected]"; // Your email ID here
Form Redirection #back to top
If you want your users to be redirected to success or Thank you page after completing the reservation or contact form successfully, We have made an easy way for you to do that. Just add data-redirect="/path/to/thanks.html" to <form> element and you are done. See example:
                        <!-- // NOTE THE data-redirect attribute -->
                        <form action="php/reservation.php" method="post" data-redirect="success.html">
Alternatively, If you don't want to use a redirect page, Just remove the data-redirect attribute or just set the value to none. Then the code will show a success message via Ajax in the same page.
Food Menu #back to top
Displaying the food menu is one of the important features of a restaurant template. This template comes with four variations of displaying menu.
- Menu List
- Menu Overlay
- Menu Tile
- Menu Gid
You may use the one suits for you. or you may use all of them by using the menu-all.html file. It contains four sections.
Instagram #back to top
Display your instagram photos in this website template. For that you will need three things
- Your Instagram Username
- Instagram Client ID
- Instagram Access Token
You may get these from the Instagram developers website. Once you have this, Open the index.html file and add these info in the data-* attribute
                         <!-- instafeed div-->
                <!-- Change your settings in the data- attributes (See documentation for help) -->
                <div id="instafeed" data-username="YOUR_INSTAGRAM_USERNAME_HERE" data-access-token="YOUR_INSTAGRAM_ACCESS_TOKEN_HERE" data-client-id="YOUR_INSTAGRAM_CLIENT_ID_HERE">
Google Map #back to top
To setup Google Maps in the contact page, Open contact.html and find the div with map ID. Then add latitude and longitude of your location (Get it from Google Maps) in the appropriate data-* attribute.
                        <!-- Google Map -->
            <!-- Set latitude and Longitude (Get it from http://google.com/maps) -->
            <div id="map" data-latitude="40.6700" data-longitude="-73.9400"></div>
You can also customize the look of the Google maps by adding custom styles in /js/vendor/map.js file. You may use the styles from Snazzy Maps. Use the code by replacing style: []
Shortcodes #back to top
There's a Shortcodes page (elements.html) with some other elements and widgets. You may use that in the Template by just copy pasting the code. Shortcodes include:
- Typography
- Alerts
- Buttons
- List Styles
- Tables
- Forms
- Nav Tabs
- Accordion
- Pricing Table
This template is built with Bootstrap. So, You can also use any other bootstrap compatible widgets. It will support nicely.
Extras #back to top
Web Hosting #back to top
Once you have finished all customizations, The next step is to upload your event website to a Live Hosting Server. For that you will need to buy a Hosting Plan and a Domain name from a Service Provider. If you already have a domain and space, you can skip this. Else read on.
Affordable Hosting & Domain Name Registration
As an Author, I can provide you cheap and affordable Shared Hosting Plan (Linux with PHP) with a Domain name. If you purchased Hosting from me, I can also help you to Upload the files correctly to the server for you. Please note that this is a Shared Hosting Plan, and if you want to host a big traffic website, Try buying VPS or Dedicated Server from other providers. Please note that the complete event website will be less than 10 MB.
Our Shared Hosting Plans
| Plan | Space | Bandwidth (MB) | Price (USD) |
|---|---|---|---|
| Basic | 50 MB | 1000 | $20 / year |
| LITE | 100 MB | 2000 | $30 / year |
| SILVER | 250 MB | 2500 | $40 / year |
| GOLD | 500 MB | 5000 | $50 / year |
| PLATINUM | 1 GB | 10,000 | $80 / year |
| CUSTOM | (your choice) | (your choice) | (contact us) |
Domain prices starts from USD 15.00 per year (.com, .net, .in, .org, .co.in etc..)
Uploading to Server #back to top
Once you have registered a domain name and Hosting, You will get FTP details from your hosting provider. Use that login details to connect with your server. You will need an FTP Software for this such as FileZilla. Connect with your server and open /public_html folder in your server. Then copy all HTML, CSS and JS files from your local machine to your root /public_html folder in your server. Please note the HTML files should be in the Server's root folder. If your local project is in /your-folder/ Do not upload the folder directly. Instead open the folder and select all HTML files and CSS, JS folders and upload.
Website Optimization Tips #back to top
A Fast & Optimized Website has several factors which needs to be implemented in order to achieve the desired results. There are several Optimization Techniques available which will definitely affect your Website's Performance in a Positive Way & we want to share a few of them with you:
-
gZip Compression & Browser Caching
This is probably one of the Most Important Techniques you should definitely implement in order to bump up your Website's Loading Speed. gZip Compression is used to compress the Files that are delivered when loading a Website. It covers HTML, CSS, Javascript & Font Files along with other miscellaneous text files. Where as Browser Caching also covers Images & Videos apart from including the above files. This is used to saves the Static Data in your Browser itself so that when you open the Next Pages on the Same Website, the content does not gets Downloaded again, loading the Website fast.
gZip Compression & Browser Caching can be enabled using the
.htaccessFile on an Apache Web Server. You can use the Codes from here: https://github.com/h5bp/html5-boilerplate/blob/master/dist/.htaccess to enable these modules on your server. -
Image Compression & Optimization
We tend to use Lots of Images on our Websites but we often do not make efforts to Compress & Optimize them. Remember, the Larger the Image, the more time it takes to download and therefore this slows your website loading times affecting User Experience. Your customer will leave your website if it does not load within 3-5 Seconds which adversely affects your Sales. Therefore, it is important to Resize, Optimize & Compress your Images before using it on your Website. Here are some Tips which might come handy in optimizing images:
- Resize your Images: Resize your Images before using it on your Website. Do not just Download an Image & place it as it is in your Website's
<img>Tag without resizing it. The size/resolution of the Image matters since it is not recommended to use an Image size of1200pxx800pxin a Content Size of300pxx200pxas this is unnecessary. Resize it to300pxx200px - Image Formats: There are three common file types that are used for web images which are JPEG, GIF, & PNG. For images with a Flat Background use JPEG images, for images with a Transparent background use PNG images and for images with Animations use GIF images.
- Compressing Images: Images Compression is important as it considerably reduces the size without losing the quality. There are several FREE Image Optimization Tools available to Download.
For MAC use ImageOptim
For Windows use Riot for compressing JPEG Images & PNG Gauntlet for PNG Images.
- Resize your Images: Resize your Images before using it on your Website. Do not just Download an Image & place it as it is in your Website's
-
CSS & jQuery Minifications
It is also recommended that you Combine & Minify all your CSS Files to a single CSS File & all Javascript Files to a single JS File since Minification reduces the size of the File and Combining the files helps in reducing the number of HTTP requests made to the server. This is also an Important Factor in increasing the speed of your website. There are several tools available online to Minify your CSS & JS Files. Our recommendations are:
For CSS use CSS Minifier and For Javascript use Javascript Minifier. -
Content Delivery Network
You can use a CDN to further speed up your website. You can use the CDN to deliver static files of your website like CSS, JS, Images & Font Files. There are several CDN Hosting Providers available on the Internet but we would recommend MaxCDN or CloudFlare. Note: CDN setup requires Extra monthly Fees to setup, so it is completely optional & according to your needs. Cloudflare also has a Free plan, you can try that for free.
-
Fast Web Hosting Servers
A lot depends on your Web Hosting Servers, so it is recommended that you choose a Hosting Company/Server that provides a Reliable & a Fast Hosting Service. You can also choose our shared hosting plans. See above.
Credits #back to top
We are really thankful to the makers of the frameworks, plugins and images below. We used these to make this Template more functional. Demo images, you have seen in Live Demo is not included in the download package because of their copyright restrictions.
Frameworks
Plugins
Libraries
Images
Others
Changelog #back to top
How to Upgrade #back to top
If you have purchased an earlier version and want to upgrade your website to the newwer version of this template, You can follow the steps. In each update, we will keep a changelog or version history, where we will keep the log of all changes made. We will list out the Changes made, Features added and Pages modified. So it will be easier for you to replace the existing. If you have modified a file which has latest update, for example, CSS, Open both page in a code editor and use a Comparison Sofware or an Online Tool like Diff Now to compare changes in both files. Then you can manually copy paste the changed lines without affecting your file. NOTE: We recommend that you keep a separate file for new additions or changes if possible.
Version 1.0 (Nov 26th, 2015) #back to top
Initial Version
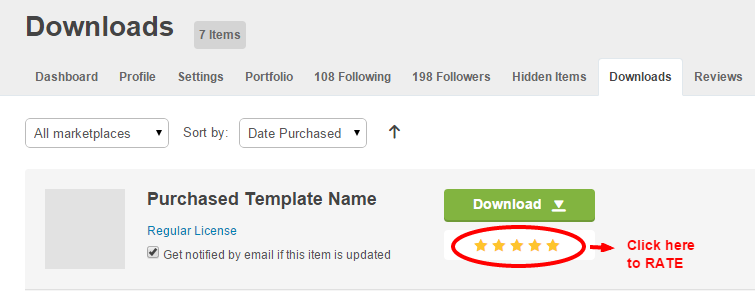
Rate it #back to top
If you like the template, Please consider Rating it on Themeforest by Visiting your Downloads Page : http://themeforest.net/downloads That means a lot to me :)
Support #back to top
Please remember you have purchased a very affordable template and you have not paid for a full-time web design agency. Occasionally we will help with small tweaks, but these requests will be put on a lower priority due to their nature. Please be patient, polite and respectful. We will try to answer your questions as soon as possible
Support for my items includes:- Responding to questions or problems regarding the item and its features
- Fixing bugs and reported issues
- Providing updates to ensure compatibility with new software versions
- Customization and installation services
- Support for third party software and plug-ins
- Make sure your question is a valid issue and not a customization request.
- Make sure you have read through the documentation and any related guides before asking support on how to accomplish a task.
- Make sure to read exisitng support questions by other users.
- Almost 80% of the time we find that the solution to an issues can be solved with a simple "Google Search". You might want to try that before seeking support. You might be able to fix the issue yourself much quicker than we can respond to your request.
- Please post on the Specific Item Category you have purchased.
Thank you! #back to top
Once again, Thank you so much for purchasing this template and being by loyal customer. You can reach me pesonally on Twitter @surjithctly or Signup for my Personal Newsletter